Use Code: BFCM20 & Save $20 Off Your Order Over $200+

Free Shipping in the Contiguous US Learn More

Use Code: NINJA & Save 20% Off Your First Order Of Transfers

SAVE $20 ON ORDERS OF $200+

BFCM20

FN-INK™ Mixing System Ink Kit

FN-INK  |  SKU: IKKT-FNMIXINGKIT-P
us-dollar
Use Code: BFCM20
Save $20 Off Your Order Above $200 | Valid Only On Select Products Thru 12/01
spam
FN-INK OUTAGE
Due to the current outage, we are offering a 20% discount on Wilflex inks through 11/30. Use code WILFLEX2024.

Size
$269.95
20.62 lb
Flat rate
multi-qty message
In stock
DESCRIPTION

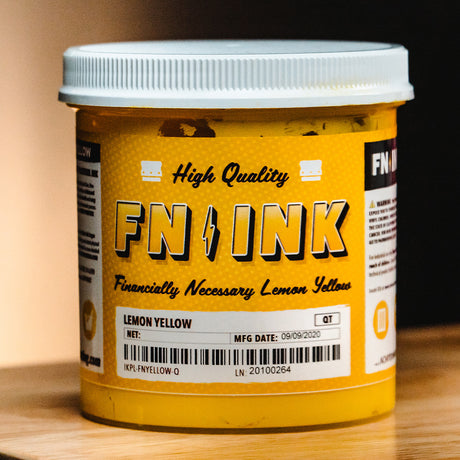
FN-INK™ helps screen printers that don’t have a lot of extra time or money, get the most effective and economical plastisol ink. With the FN-INK™ Mixing System, printers can mix almost any Pantone Coated Color while having the option to use the colors straight from the container if a customer doesn’t need color matching. The two-for-one plastisol line bolsters productivity and saves printers’ money. 

The FN-INK™ Mixing White was formulated, designed, and balanced to be used with the FN-INK™ Mixing System colors to create Simulated Pantone Coated Colors. Mixing colors is simple. Pull up the software and select the Pantone color needed, grab and weigh out colors specified in the formula, and mix. It’s that easy.

FN-INK™ is a non-phthalate, plastisol ink. If customers don’t need a Pantone color, you can use the ink right out of the bucket. FN-INK™ was designed by screen printers, for screen printers to be easy to work with. The FN-INK™ line includes 15-ready-to-use colors.

The fact that FN-INK™ easily cures at lower temperatures (260 degrees), means shops can see real gains in production. Financially Necessary Ink was manufactured to be a great ink at a great retail price, day in and day out. Printers can have the peace of mind that their hard earned dollars are getting the best ROI with this FN-INK™.

Bring your art to life with an endless amount of colors. Start mixing custom colors with the FN-INK™ Mixing System today.

>> VIEW THE DIGITAL COLOR CARD HERE <<

FEATURES
  • Bold & vibrant colors.
  • Creamy & Easy to Print Inks.
  • Soft-hand prints.
  • Limited wet-on-wet printing.
  • Short flash times, lower cure temperature.
  • Printers can mix custom colors or use ink straight from the container.
MIXING KIT INCLUDES
  • FN-INK™ Mixing White
  • FN-INK™ Black
  • FN-INK™ Bright Red
  • FN-INK™ Ruby Red
  • FN-INK™ Yellow
  • FN-INK™ Golden Yellow
  • FN-INK™ Kelly Green
  • FN-INK™ Light Blue
  • FN-INK™ Royal Blue
  • FN-INK™ Light Royal Blue
  • FN-INK™ Navy Blue
  • FN-INK™ Magenta
  • FN-INK™ Fuchsia
  • FN-INK™ Orange
  • FN-INK™ Violet

Here's a breakdown for each kit:

  • Pint Kit: pint of all colors, quart of Mixing White
  • Quart Kit: pint of Magenta, gallon of Mixing White, quarts of remaining colors
  • Gallon Kit: quart of Magenta, five-gallon of Mixing White, gallons of remaining colors
RECOMMENDATION FOR USE

For single print colors, colors will reproduce best over white or light-colored garments. When printing on a base white, some color shift may occur. This is normal and can be adjusted for by either printing a thicker ink deposit with lower mesh counts or by print-flash-print the color. You can also choose a slightly darker color in the PMS book. When it’s printed over the base white, it will typically lighten up and be a closer match. When direct printing over dark cotton, there is no guarantee you will maintain color integrity due to each ink's inherent opacity. As a result, not all colors will have good coverage when printed directly to fabric.

If printing a new PMS color, test through a 156 mesh onto white fabric, cure, and color checked in a light corrected box, or light correct space. Printing onto mid- or dark-colored garments may require the use of a base white for best color reproduction. Since all PMS colors (across all ink mixing systems) vary in opacity and coverage, it’s recommended to test before running production.

MIXING INSTRUCTIONS

To mix custom colors, you’ll also need a scalespatulasPantone Coated Book, and mixing containers.

  1. Pull up the mixing software on your computer or phone.
  2. Type in the Pantone number or scroll through the drop-down menu.
  3. Input the amount of grams of ink you need in grams.
  4. Click “Load Formula.” 
  5. On the left side of the screen, the formula will appear. It’ll show the colors needed and the amounts. On the right, a lightning bolt will show the Pantone color.
  6. Place the container onto the scale and zero it out.
  7. Start adding the ink with the highest volume listed in the formula.
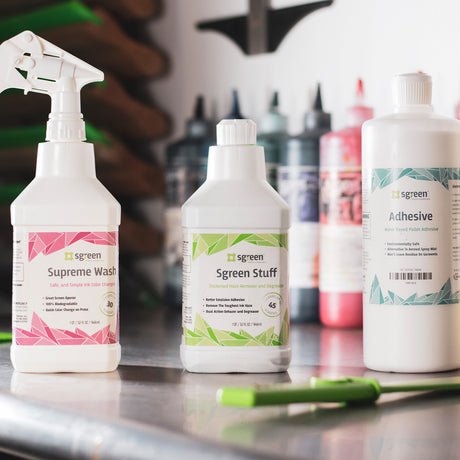
  8. Once the appropriate amount is in the container, set that color aside and clean off the spatula with an ink cleaner like Supreme Wash. You can also use a spatula for each color to avoid contaminating the inks.
  9. Zero out the scale again and add the next highest volume. Repeat as necessary.
  10. Once all the colors have been added to the container, use a clean spatula to mix the ink. Be sure to scrape the ink from the bottom of the cup and mix it into the rest of the ink.
CURING INSTRUCTIONS

Flash at 180-200°F, for 3 - 5 seconds. Each shop’s operating parameters might be faster or shorter depending on your production variable. Cure at 260°F, the ink is cured when it hits 260 throughout the entirety of the ink layer.

*Cure is attained when the ENTIRE ink layer reaches 260°, meaning that the ink is 260° from the top to the bottom of the ink layer. If you are using a laser gun to read the surface temp, this WILL be misleading. Laser temp guns give you a reflective reading. When tested side-by-side with a donut probe, you will see temperature differences as great as 120°-150° early in the cure cycle (the donut probe accurately measures the contact temperature where the crosshairs reside). As you reach the end of the dryer, those temperatures will get closer together. As a direct result – you will need to read a surface temp as little as 60° above what stated cure temp is and as much as 100° depending on how short your dryer tunnel is and how hot your settings are. This is due to a few things:

  1. The rate that plastisol ink absorbs heat. Some colors will heat up faster than others as they absorb infrared heat waves more readily.
  2. How hot the ink is when entering the tunnel. Cooler inks will take longer to heat up, thus taking longer to reach cure.
  3. The thickness of your ink deposit. As we all know, thicker ink deposits take longer to cure than thinner ink deposits. A longer dwell time is needed to reach full-cure through the whole ink layer. Heat/IR waves take time to penetrate and heat up the ink.
  4. The length of your tunnel. Curing ink is about temperature and time. It takes time for the entire ink layer to heat up and reach cure temp. The faster and hotter you run, the greater your chance to not reach full cure temp at the bottom of the ink layer.
  5. Cotton garments take longer to heat up compared to polyblends or 100% polyester. This is due to the absorptive nature of cotton. Cotton soaks up and holds onto water. When putting the shirt through the dryer, the dryer will release the water in the cotton fibers, slowing down how fast ink heats up. This process directly relates to how water based ink heats up and reaches cure, just on a smaller scale.
  6. The quality of your infrared panels. IR Panels are not created equal. Without diving into the deep details, some panels are more efficient in creating heat within the ink layer than others.

When changing your dryer to low cure temps, follow the recommendations and parameters laid out above and do wash testing to ensure your new dryer settings are reaching full cure.

CLEAN UP

Ink degradent or press wash.

STORAGE INFORMATION

Store at 65-90°F (18-32°C), avoiding direct sunlight. 

FREE GROUND SHIPPING (SUPPLIES ONLY)

FREE SHIPPING

All supplies in orders over $275 ship for free. Orders below $275 ship for $15. Orders placed before 3pm local time typically ship the same day.

FLAT RATE SHIPPING

Flat rate shipping charges will be assigned to our Equipment and heavier consumable items. View our entire FREE Shipping Policy

GROUND SHIPPING ZONES

UPS Ground Shipping Zones

If you need clarity on estimated shipping to your area please chat with us or call us at 1-800-314-6390

FN-INK™ Mixing System Ink Kit Pints | Screenprinting.com
FN-INK

FN-INK™ Mixing System Ink Kit

From $269.95

FN-INK™ helps screen printers that don’t have a lot of extra time or money, get the most effective and economical plastisol ink. With the FN-INK™ Mixing System, printers can mix almost any Pantone Coated Color while having the option to use the colors straight from the container if a customer doesn’t need color matching. The two-for-one plastisol line bolsters productivity and saves printers’ money. 

The FN-INK™ Mixing White was formulated, designed, and balanced to be used with the FN-INK™ Mixing System colors to create Simulated Pantone Coated Colors. Mixing colors is simple. Pull up the software and select the Pantone color needed, grab and weigh out colors specified in the formula, and mix. It’s that easy.

FN-INK™ is a non-phthalate, plastisol ink. If customers don’t need a Pantone color, you can use the ink right out of the bucket. FN-INK™ was designed by screen printers, for screen printers to be easy to work with. The FN-INK™ line includes 15-ready-to-use colors.

The fact that FN-INK™ easily cures at lower temperatures (260 degrees), means shops can see real gains in production. Financially Necessary Ink was manufactured to be a great ink at a great retail price, day in and day out. Printers can have the peace of mind that their hard earned dollars are getting the best ROI with this FN-INK™.

Bring your art to life with an endless amount of colors. Start mixing custom colors with the FN-INK™ Mixing System today.

>> VIEW THE DIGITAL COLOR CARD HERE <<

FEATURES

  • Bold & vibrant colors.
  • Creamy & Easy to Print Inks.
  • Soft-hand prints.
  • Limited wet-on-wet printing.
  • Short flash times, lower cure temperature.
  • Printers can mix custom colors or use ink straight from the container.

MIXING KIT INCLUDES

Here's a breakdown for each kit:

RECOMMENDATION FOR USE

For single print colors, colors will reproduce best over white or light-colored garments. When printing on a base white, some color shift may occur. This is normal and can be adjusted for by either printing a thicker ink deposit with lower mesh counts or by print-flash-print the color. You can also choose a slightly darker color in the PMS book. When it’s printed over the base white, it will typically lighten up and be a closer match. When direct printing over dark cotton, there is no guarantee you will maintain color integrity due to each ink's inherent opacity. As a result, not all colors will have good coverage when printed directly to fabric.

If printing a new PMS color, test through a 156 mesh onto white fabric, cure, and color checked in a light corrected box, or light correct space. Printing onto mid- or dark-colored garments may require the use of a base white for best color reproduction. Since all PMS colors (across all ink mixing systems) vary in opacity and coverage, it’s recommended to test before running production.

MIXING INSTRUCTIONS

To mix custom colors, you’ll also need a scalespatulasPantone Coated Book, and mixing containers.

  1. Pull up the mixing software on your computer or phone.
  2. Type in the Pantone number or scroll through the drop-down menu.
  3. Input the amount of grams of ink you need in grams.
  4. Click “Load Formula.” 
  5. On the left side of the screen, the formula will appear. It’ll show the colors needed and the amounts. On the right, a lightning bolt will show the Pantone color.
  6. Place the container onto the scale and zero it out.
  7. Start adding the ink with the highest volume listed in the formula.
  8. Once the appropriate amount is in the container, set that color aside and clean off the spatula with an ink cleaner like Supreme Wash. You can also use a spatula for each color to avoid contaminating the inks.
  9. Zero out the scale again and add the next highest volume. Repeat as necessary.
  10. Once all the colors have been added to the container, use a clean spatula to mix the ink. Be sure to scrape the ink from the bottom of the cup and mix it into the rest of the ink.

CURING INSTRUCTIONS

Flash at 180-200°F, for 3 - 5 seconds. Each shop’s operating parameters might be faster or shorter depending on your production variable. Cure at 260°F, the ink is cured when it hits 260 throughout the entirety of the ink layer.

*Cure is attained when the ENTIRE ink layer reaches 260°, meaning that the ink is 260° from the top to the bottom of the ink layer. If you are using a laser gun to read the surface temp, this WILL be misleading. Laser temp guns give you a reflective reading. When tested side-by-side with a donut probe, you will see temperature differences as great as 120°-150° early in the cure cycle (the donut probe accurately measures the contact temperature where the crosshairs reside). As you reach the end of the dryer, those temperatures will get closer together. As a direct result – you will need to read a surface temp as little as 60° above what stated cure temp is and as much as 100° depending on how short your dryer tunnel is and how hot your settings are. This is due to a few things:

  1. The rate that plastisol ink absorbs heat. Some colors will heat up faster than others as they absorb infrared heat waves more readily.
  2. How hot the ink is when entering the tunnel. Cooler inks will take longer to heat up, thus taking longer to reach cure.
  3. The thickness of your ink deposit. As we all know, thicker ink deposits take longer to cure than thinner ink deposits. A longer dwell time is needed to reach full-cure through the whole ink layer. Heat/IR waves take time to penetrate and heat up the ink.
  4. The length of your tunnel. Curing ink is about temperature and time. It takes time for the entire ink layer to heat up and reach cure temp. The faster and hotter you run, the greater your chance to not reach full cure temp at the bottom of the ink layer.
  5. Cotton garments take longer to heat up compared to polyblends or 100% polyester. This is due to the absorptive nature of cotton. Cotton soaks up and holds onto water. When putting the shirt through the dryer, the dryer will release the water in the cotton fibers, slowing down how fast ink heats up. This process directly relates to how water based ink heats up and reaches cure, just on a smaller scale.
  6. The quality of your infrared panels. IR Panels are not created equal. Without diving into the deep details, some panels are more efficient in creating heat within the ink layer than others.

When changing your dryer to low cure temps, follow the recommendations and parameters laid out above and do wash testing to ensure your new dryer settings are reaching full cure.

CLEAN UP

Ink degradent or press wash.

STORAGE INFORMATION

Store at 65-90°F (18-32°C), avoiding direct sunlight. 

Size

  • Pints
  • Quarts
  • Gallons
View product