Reclaiming screens has to be one of the most tedious parts of screen printing. Who hasn’t procrastinated and left screens sitting by the washout booth without reclaiming them? With the right cleaners and good habits, your reclaim process can be super easy.
WHAT YOU’LL NEED
To start the reclaim process, you’ll need the following items:
- A washout booth
- Cleaning chemicals
- A pressure washer or hose with a pressurized spout
- Scrub brushes
Pro Tip: Each cleaning chemical you use should have its own scrub brush. Label them with the chemical they’re used for so you don’t get mixed up.
If you’ve used Sgreen® chemicals before, you’ll notice that each bottle has a number on it. These numbers correspond to steps in the cleanup and reclaim process. Follow those steps to get the best reclaimed screen possible.
CLEAN OFF EXCESS INK
Before you begin reclaiming, you need to remove all excess ink off the screens. This should be done on press, or in a dedicated space so you don't send ink down the drain. You can use an ink spatula, cleanup card, or just about anything to get the excess ink off your screen and back into the bucket.
Once your screen is free of ink, head to your washout booth, put on your apron, and get started.
STEP 1: SUPREME WASH/INK DEGRADER
Supreme Wash is a great on-press cleaner. If you are doing a color change or if you’re going to be using that screen again and don’t need to reclaim it, using Supreme Wash is generally good enough on its own. All you need to do is to spray the chemical onto the screen, wipe it off with a rag, and you’re good to go.
If you are doing a full reclaim, grab Sgreen Ink Degrader to get all that ink out of the screen. Ink Degrader takes longer to evaporate, so it’s better to use once you’re done printing with that screen. The process is the same as Supreme Wash: spray, wipe, and celebrate.

WATER-BASED INK CLEANER
For water-based inks, use Aqua Wash. Spray or pour a moderate amount onto the screen.
Grab a shop towel or rag of choice and scrub both sides of the screen, re-applying Aqua Wash as needed, until the screen is clean.
If you’re reusing the screen, rinse both sides of the screen clean with pressured water to help remove any residual pigment from the image area.
RELATED: BEST PRACTICES FOR CLEANING INK OFF SCREENS
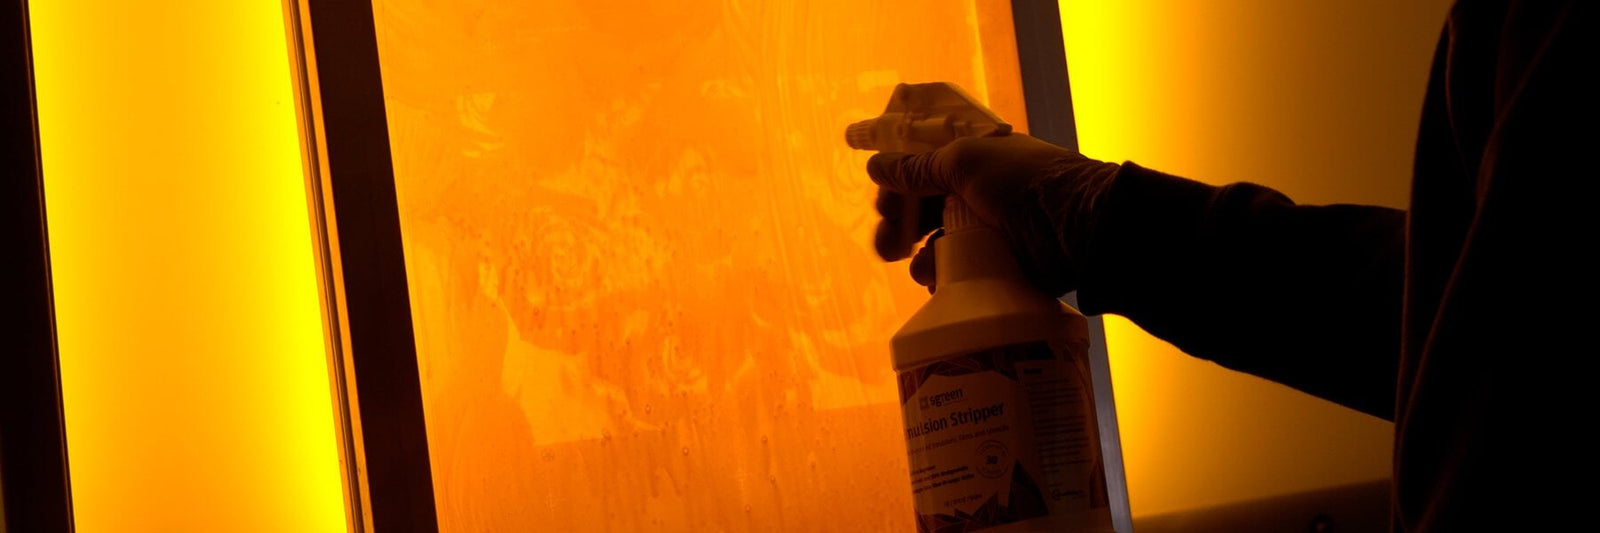
STEP 2: EMULSION REMOVER
Emulsion Remover is pretty self-explanatory: it removes emulsion. Once you’ve completed step one and your screen is ink-free, spray some emulsion remover onto the screen. Grab your emulsion-remover scrub brush and scrub in a circular motion on both sides of the screen until you see the stencil begin to soften.
Pro Tip: If you apply too much pressure, you can pop the mesh out of the screen. Don’t worry too much though: you’ll have to apply a significant amount of pressure before it would happen.
Once you’ve scrubbed with the emulsion remover, let it sit on the screen for about 30 seconds to continue loosening the emulsion. Try not to let it completely dry on your screen. Once time is up, pressure wash the screen from the bottom up on the t-shirt side of the screen. Keep the pressure washer about 12 inches away from the screen. Too close and you can damage the mesh.
RELATED: DO I NEED A PRESSURE WASHER FOR SCREEN PRINTING?
Your emulsion should wash out pretty easily. Repeat this step on any emulsion that is still holding on. Once your emulsion is out of the screen, it’s time to dehaze.

STEP 3: SGREEN STUFF OR HAZE REMOVER
Sometimes you’ll have a ghost image on your screen that’s left after you’ve removed the emulsion. For these issues, you’ll want to have either Sgreen Haze Remover or Sgreen Stuff in your arsenal.
Once you’ve finished removing the emulsion, pour or spray a generous amount of Sgreen Stuff or Sgreen Haze Remover onto your screen. The big difference between the two? Sgreen Stuff is a gel that will stay where you pour it onto the screen, while Haze Remover is a spray.
No matter which product you use, the procedure is the same. Scrub both sides with a dedicated scrub brush. Make sure to scrub near the edges of the screen.
Let it sit for up to three minutes, then pressure wash the screen from the bottom up. Give your screen a flood rinse with a hose to finish up. The water should cascade down the screen in a sheet.
RELATED: DEHAZE, DEGREASE, DE-GHOST WITH SGREEN® STUFF
STEP 4: DEGREASER
If you are having any trouble with fisheyes and pinholes, or if you want to take an extra step to ensure your screens are practically perfect, use a degreaser to get your screen ready for your next job.
If you use Sgreen Stuff or Haze Remover, you’ll probably won’t need to do this since those products are both dehazers and degreasers. Using a separate degreaser will further minimize any chemical spots, grease spots, or anything left on your screen.
Spray a generous amount onto your screen and scrub both sides. Let it sit for up to three minutes, then flood rinse. Look for imperfections before drying.

Once you’ve completed all four steps, wipe off the frames with a hand towel or rag. Try not to let the towel touch the mesh of the screen, because you can get fibers on the screen that will cause issues when you try to coat it next time.
Dry your screen in a safe area like a drying cabinet or screen rack. Use fans so the screen dries properly.
There you have it! Reclaiming screens couldn’t get easier (well, it could if you invested in a dunk tank). Follow these steps every time and you’ll have squeaky clean screens for every new job.