With Adobe® Photoshop, printers can convert any grayscale image into halftones. Don’t have R.I.P. software? Not a problem. By converting to a bitmap, printers can create a halftone pattern that will print images like a dream. Here’s how to do it.

GET SET UP
First, it’s time to set up the process. Making the image a grayscale image is the first step. To do this, navigate to Image, clicking Mode, and choosing Grayscale. When asked to discard all the color information, click "yes." Once you've done this, all the color will be gone from the image.
Using the eyedropper tool, check the grayscale values of the image. Make sure the areas you want to be 100% black or white are matching. The "K" or black should be the only color showing any information. If you’re not totally satisfied, open the Curves window using Control+M and make adjustments to the colors.
Now it’s time to convert the design to halftones.
TAKE THE FREE, ONLINE COURSE — PHOTOSHOP FOR SCREEN PRINTING: THE BASICS

CONVERTING TO HALFTONES
When you convert a design to halftones, you won’t be able to make any changes to the image. Make sure it looks the way you want before following the next steps.
Head to Image and click on Mode. Above the grayscale button you used, there will be an option for Bitmap. Click it. A window will pop up asking if you want to flatten the layers. Click "yes."
Let's talk about DPI for a moment. The DPI (dots per inch) may be higher in the output than the original design. Why is that? Basically, the design is upsampling because you’re creating small round shapes that are all pixel-dependent in Photoshop. The higher resolution you use for the conversion, the smoother the dot shape will be.
While you can convert to halftones at higher than 600 DPI, Photoshop has a minor hiccup as you approach 1200 DPI that will add more lines or rows of dots when converted. You’ll also need to consider your output device. Inkjet has max resolution based on ink droplet size, 600 is pretty normal in screen printing.
There’s one more step. In the Bitmap pop-up, choose Halftone Screen for the method and click OK. The halftone screen is the halftone frequency, or Lines Per Inch (LPI). Standard LPI is 45 or 55. The lower the LPI, the bigger the dots will be. The higher the LPI is, the smaller the dots will be. Choose a round dot shape and 25-angle. Click OK and watch the magic happen!
RELATED: PREPARING ART AND SCREEN PRINTING CMYK WITH WATER-BASED INKS

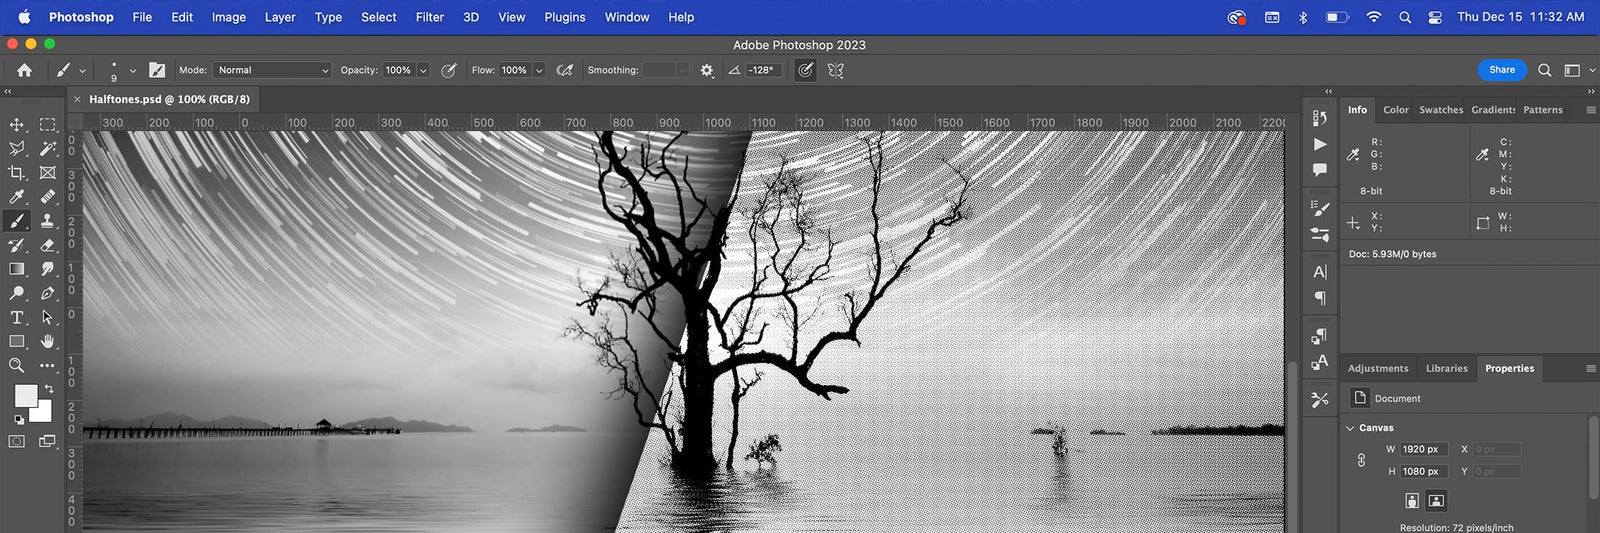
THE RESULTS
Zoom in and check out the dots that showed up. Some of them don’t look like dots based on the information in the image. However, once the design is on the film and screen, you won’t see the individual dots because the dots are so small.
Happy with the outcome? Either bring Bitmap into Adobe® Illustrator and add vector elements or text and print or print from Photoshop and start screen printing. Want to learn more about the basics of Adobe® Photoshop? Check out this free course and get started designing in Photoshop.