
Ready to make a screen and you aren’t quite sure where to start? You’ve come to the right place. We'll walk you through each step of the process of how to make a screen for screen printing.
It’s true what they say: A good print starts with a good screen.
This seems simple, but high-quality screen creation is one of the most difficult processes to master. With variables like humidity, temperature, aging emulsion, and variations in exposure units, mesh counts, designs, and emulsions, it’s important to dial in the specifics of your screen-making process. For the best results, make sure you take proper care with each step, and maybe even implement a few tricks along the way.
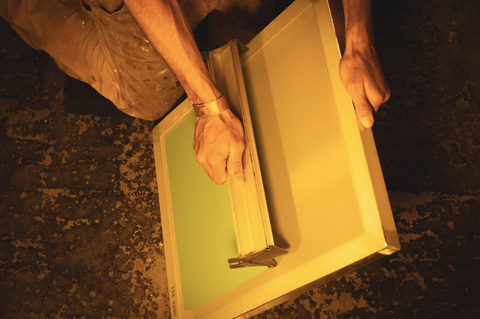
FIRST STEP — DEGREASING
Whether your screen is fresh out of the box or you just finished reclaiming, you need to degrease the screen. Degreasing removes any oils, dust, and dirt from the mesh, all of which can cause issues in the adhesion of your emulsion. For example, if dust or debris is on your screen when you apply emulsion, pinholes will appear. You can usually detect them by holding the screen up to a light source and looking for light holes. Pinholes are easily fixed with a piece of tape or a blockout solution.
Fisheyes are another common screen flaw. Fisheyes appear when oil becomes trapped under the emulsion, separating it from the mesh and leaving small holes on the covered screen. Often, these are the culprit of fingerprints, another reason why degreasing brand new screens is a necessity.

To degrease, you need a degreaser. We suggest to use Sgreen® Degreaser. It's a water-based, eco-friendly product that'll gently remove oils, dirt, and dust. Learn more about the green chemistry line.
The degreasing process is fairly simple. First, rinse your screen thoroughly with water, both the mesh and frame. Then spray a liberal amount of degreaser onto mesh. Take a clean scrub pad, or one specifically used for degreasing, and scrub both sides of the mesh, inside the frame and outside the frame (be sure to clean every portion of the screen). After you’ve degreased the whole screen, rinse it down with water at a low pressure until you see no more soap bubbles.
DRYING CLEANED SCREENS
Next, take the screen and place it in your screen rack for drying, shirt side down. If you don’t have a screen rack, you can suspend it horizontally with objects like 2x4s or a stack of cleanup cards. Make sure that the screen is supported only by the frame and that air is allowed to flow evenly over both sides of the mesh. Place a fan in front of the rack so air can pass over the screens. If you can, invest in a dehumidifier to help remove the moisture from the screens. You should not move on to the emulsion coating step until the screen is thoroughly dried.
LEARN MORE ABOUT DRYING SCREENS
STEP TWO — EMULSION
Choose your emulsion with your ink in mind. As with most parts of the screen printing process, it’s important to consider all of the elements and choose the best products for the type of print you are making. Water-based and discharge inks require an emulsion that's water sensitive because the water in the ink can erode the emulsion. Plastisol inks are more forgiving since their low water content does not decay the emulsion as quickly. Consider your design and exposure unit’s accuracy as well. Some emulsions are more time-sensitive than others, and each exposure unit will need to be dialed in specifically for that emulsion’s exposure time.
COATING A SCREEN
Applying the emulsion onto your screen requires the use of a scoop coater. You should select your scoop coater size based on the size of your screen. A 4″ difference between the scoop coater size and the outside dimensions of your screen is recommended. This allows for a small space of open mesh on all sides of your scoop coater to make coating easy while giving you the largest comfortable area for printing.
Most scoop coaters have two edges. One is more rounded, and can be used to create a slightly thicker layer of emulsion for more ink deposit onto your garment when printing. Thicker emulsion layers are useful when printing on sweatshirts and for other high-density applications. The other edge of the scoop coater is called the sharp edge, and will allow you to coat your screen with a thin layer of emulsion. Thinner layers are great for printing water-based and discharge inks, or if you want a softer hand on your garment.
To coat your screen with liquid emulsion, first make sure that your emulsion is appropriately mixed and that you are in a light-safe area. Pour a small amount of emulsion into your scoop coater, enough to fill the entire bottom of the scoop coater evenly, from one side of the end caps to the other. Hold the screen vertically with your non-dominant hand, shirt side out.
Pick up the full scoop coater with the other hand, placing your chosen edge along the bottom of the open mesh about an inch above the frame. With your dominant hand, lower the screen and scoop coater to allow the emulsion to make contact with the mesh, all the way across the length of the scoop coater. Then slide the scoop coater evenly up the open mesh, as you slowly raise the tilt of the screen, stopping about an inch before the top of the frame. Your screen should be in an almost vertical position again, with the scoop coater held securely against it. Tilt the scoop coater back, keeping the bottom edge in contact with the mesh, and allow the extra emulsion to fall back into the trough of the scoop coater, away from the mesh. Once you’ve done that, you can remove the scoop coater and flip your screen around to the other side. Repeat the same process for the squeegee side of the mesh, making sure that you are evenly applying the emulsion all the way up.
DRYING A COATED SCREEN
Dry your emulsion horizontally with the shirt side down in a clean, dark room. Place the screens on a drying rack or cabinet. Drying racks are also a great way to keep your darkroom organized and will allow you to stock up on extra screens that are ready for burning. Enclose your drying area by putting the screen rack in a closet, building a wall around it, or string a plastic curtain.
Once you have encased the area, put a dehumidifier in space. It'll keep moisture out of the air, help create airflow, and push out warm air. In smaller shops, a dehumidifier is the only source of warm air you'll need. You will also want fans — 20" box fans or standing fans work well. Place the fans where it'll blow directly across the emulsion while picking up the dry, warm air from the dehumidifier. Having this setup will accelerate the drying of the emulsion.
It’s important to be aware of the humidity in your darkroom during this step of the process. Too much humidity, whether due to climate, weather, or location, can cause the drying process to slow down significantly and even prevent proper curing. A handy tool to have is a hygrometer. It's a device that will tell you the humidity level in your room, share the highs and lows of humidity for the past day, and show the temperature. You'll want to keep your moisture levels between 30-40%. The lower you can get it, the better for your screens. Humidity exceeding 50% can result in a large number of issues, such as tacky emulsion, faster breakdown of the stencil, more difficulty reclaiming, and a higher chance of pinholes and ghost images.
Under ideal conditions, your screen should take about an hour to completely dry but it can take as many as 24 depending on your environment.
STEP THREE — FILM
Just as a high quality print comes from a high-quality screen, the same is true for your film positive. A good film positive has a high opacity and light cannot be seen through the design when held to a light source. The edges are clean and sharp, free from any pixilation or softness. The film itself is blemish-free and clear (or milky, as with inkjet film), free of fingerprints, marks, and excessive dust. You can immediately tell if your screen will burn well or not, depending on those markers. If you find that your film does not meet up with these standards, take a look at your original art. Most of the issues stem from original low quality art, and can be fixed in your design program, but there are actions you can take to help boost the opacity of your film positives. Track the quality of each step in your process, as each element builds on itself. Good quality steps as you make a screen makes good quality prints later on.
PRE-REGISTRATION
Pre-registering your screens is a process in which you line up and burn each film in the same location on each screen. When done correctly, it makes registering each screen on the press a relatively simple process with only minor tweaks. It’s fairly easy to do, especially when using a pre-registration template and light table.
To preregister your films, lay the film down on the registration template, right side up so it is readable to you. You will burn the film so that the words or design is correct when looking at the design from the squeegee side of the screen. Each film should include registration marks at the top and bottom, or all four corners. Line these up with the marks on the registration template and put two pieces of tape, sticky side up, on the underside of the film at two ends. Then, take your dry, covered screen and lay it down on top of the registration template in the area designated for the screen. Make sure that you are in a light-safe environment, since you are still working with an unexposed screen. Rub the areas where you placed the tape to stick the film to the screen, then lift it up and repeat the process for each film in that design. By lining up the registration marks and screens in the same spot every time, each film should be located in the same spot on every screen when you burn them.
STEP FOUR — EXPOSING SCREENS
Make sure you have your exposure time really dialed in before you burn your first screen. Depending on your exposure unit and type of emulsion, the length of exposure will vary. You can calculate your exposure time using a step wedge calculator. After you have exposed a screen, you should be able to wash out the calculator until you hit step seven, meaning it has been properly exposed. If you can wash out past the seventh mark, the screen is under-exposed. If it stops washing out before the seventh mark, the screen is over-exposed.
Burning your screens is pretty simple. Place the coated screen and taped design shirt-side down on the exposure table with the film facing the light. If you have a vacuum exposure unit, close the seal and hit the vacuum button. Otherwise, place your screen filler and weight on top of the screen to create a positive contact between film, screen, and glass to prevent any light leaks from spreading around the edge of your design and ruining the nice, sharp burn. Hit the UV light and expose the screen for the appropriate amount of time.
LEARN ABOUT THE RXP LED EXPOSURE UNIT
STEP FIVE — WASHING SCREENS
Your washout area might look different than the next shop, depending on your space restrictions and plumbing options. All washout booths should have a few key things — an area to place your screen for washing and running water with both high and low pressure options and high and low water pressure to control rinsing the burned screen.
First, remove the film positives and tape from your burned screen, then place it into your washout booth standing on one end. Give it a thorough rinse with low pressure water on both sides to start the process of breaking down the unexposed emulsion in the stencil area. Don’t leave it to sit too long like this, you only really need to rinse it once before starting to spray it out. Next, change your water to a higher pressure. Begin to spray the design going side to side, and moving down the screen. The emulsion that was uncured and covered by your film should rinse out, leaving open mesh where your design will appear. Once it’s completely cleared out, give the screen one more quick rinse to wash off any leftover emulsion slime. Don’t expose the screen to water for an unnecessarily long time, as it will eventually break down the emulsion and water-log your stencil.

Check your screen and make sure the mesh is completely washed out in your stencil by holding it up to a light source and looking through the mesh. Don’t forget to wash out your registration marks too, as they will be crucial in helping you register your screens to each other on the press.
Lastly, dry the screens like you did before. Once they are bone-dry, the screens are ready to be put on press.
POST-EXPOSURE OPTIONS
Some screens will require an additional step after washing out your design to boost their longevity. Shops using their screens for multiple print cycles, long print runs, or printing water-based and discharge ink may choose to add an emulsion hardener to the screen after it has dried. This creates an even more durable emulsion stencil and prevents it from breaking down as quickly.

Forte Clothing Co. exposing their screens in the sun.
Another technique you can use is post-exposure. By placing your dried and washed out screen into direct sunlight, or re-exposing it in your exposure unit, you can create a slightly more durable emulsion stencil with this technique as well.
By following these steps and utilizing some of the equipment and techniques outlined above, you should be confident any time you set out to make a screen making for screen printing. Just remember: while each step may seem like it’s a time consuming task, it helps eliminate mistakes in the end.