
It’s no secret that LED exposure is the new standard. It’s more economical, less wasteful, provides stronger stencil development, and allows printers to do more with a screen. LED exposure is now the standard for DIY printers, too. But what’s the big deal? How do DIY printers use an LED bulb as opposed to a UV bulb? Stick around to find out.

WHAT’S DIFFERENT ABOUT THE NEW BULB
More and more exposure units now come with LED bulbs. Why? Tons of reasons like their spectrum of light output, energy usage, longevity, speed, and consistency. The main reason printers love LEDs is because they can penetrate deeper into the emulsion layers, resulting in higher quality, more durable stencils.
Think of exposing emulsion like baking cookies. An underbaked cookie is soft and yummy, but you can’t dunk it into milk without it falling apart. Similarly, an underexposed screen will work, but will break down much more quickly than a properly exposed screen (or well-baked cookie).
With an LED exposure bulb, you’re going to get that well-baked, properly exposed screen. To make the switch, all you have to do is replace your UV exposure bulb with an LED bulb and continue as normal. Simply screw in the bulb to any light fixture and safely expose a screen with the recommended Baselayr Long Lasting emulsion for 10-11 minutes in a light safe environment.
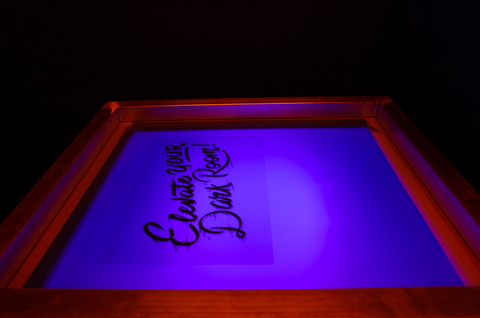
RELATED: LED EXPOSURE: THE NEW STANDARD
EXPOSING A SCREEN WITH THE DIY BULB
New to screen exposure? Here’s seven simple steps to exposing a screen with a DIY bulb:
- DIY bulbs are meant for exposing smaller screens, like 16x20 or 20x24. Since the bulb is small, the “sweet spot” for exposure will be smaller. A 16x20 screen will work the best with the DIY LED bulb.
- Source a light fixture to power the bulb. It’s best to find a fixture with a reflector on the back to direct the light as much as possible.
- In a light safe environment, center the bulb directly above the middle of the screen at a height of 12-15 inches.
Note: The higher your bulb is, the longer your exposure time, and the more coverage to the screen. The lower your bulb is, the shorter your exposure time, but the more direct your light source is to the center of the screen. For larger screens, use a higher distance and increase exposure time.
- Place the film in reverse onto the shirt side of the screen and tape it to the screen. If the transparency is not opaque, the screen will not expose well. To get the darkest film possible, use glossy photo paper, adjust the printer settings, use third-party inks, or—as a last resort—double up the films. Learn more about getting a darker film transparency here.
- Add a piece of thin, optically clear glass on top of the film to increase the positive pressure during exposure. This is optional, but strongly recommended, as it will increase the detail gained during exposure. Positive contact is super important when exposing a screen. You want the least amount of distance between the screen, film, and glass.
- Ensure your screen is bone dry before exposing. Dry and expose coated screens in a room under 40% humidity. You can check the humidity in your darkroom by using a hygrometer. You can create a dark, warm, dry space in many places in your shop.
- Expose for 10-11 minutes in a light safe environment. The more emulsion your screen has, the longer your exposure times will be. Increase exposure for lower mesh counts.
- Rinse out your screen in a light safe environment.
Make sure to take notes on your process: coating method, exposure times, final results, and anything else that will help you replicate this process again.
REPLACE UV BULBS IN AN EXPOSURE UNIT
If you have a small UV exposure unit, you can replace those UV bulbs with the LED DIY bulb. It’s easy, since both types of bulbs are the standard screw in bulb type. Simply unscrew the old UV bulbs and screw in the LED bulb. You’ll be able to expose a better screen with LED light than with UV light, and you won’t have to break your budget to do it.
EXPOSURE TIPS
For every screen that gets exposed correctly, there’s a dozen that don’t. Here are some scenarios you might run into if your image does not expose or wash out properly.
DIAL IN THE DARKROOM
First, ensure you are in a light safe environment. Block out light from windows and doors, and make sure to turn off all lights that emit UV light. You can replace the lights in your darkroom with light-safe bulbs, or keep a separate lamp with a light-safe bulb so you can still see while in the darkroom.
Make sure your screen is coated with a thin coat of emulsion and allowed to dry so it is smooth to the touch. If the emulsion is tacky, you need to either coat it with less emulsion or dry it for a longer period of time. You can use a clean fan or dehumidifier to speed up the drying process.
RELATED: GOING OVER THE BASICS: COATING AND EXPOSING SCREENS
The screen needs positive contact to expose correctly. Make sure there’s positive contact between the film positive and the screen mesh. Add a sheet of glass and/or foam under the screen to increase positive contact.
If the screen exposes but is slimy, increase exposure time by 1-2 minutes and try again. Dialing in your darkroom is all about testing, making mistakes, and learning from them.
GET A DARK FILM POSITIVE
Another way to make sure the screen exposes properly is to ensure the film positive is dark. This task might be as simple as adjusting your printer settings to print the most opaque black possible, or might involve investing in third-party all black inks. To create an all-black system, you’ll need to find third party black inks that work with your printer. Visit sites like InkOwls to find aftermarket black ink and refillable cartridges that are compatible with your printer.
Note: Purchasing third-party black inks will void the warranty on your film output printer. Make sure that this option is right for your shop.
The last resort in getting a darker film positive is to double up your films on a screen. Not only is this wasteful and difficult to align the films just right, it creates a thicker film to expose through.
The film naturally blocks some light anyway, so doubling them up will block even more light. Because of this, exposure times are going to be about a third longer, and you won’t be able to use an exposure calculator to properly test for proper exposure. If you’re doubling up film, exposing a screen to a solid step 7 won’t necessarily be accurate. You can run into a lot of problems in your darkroom by doubling up film.

Before long, you’ll have this exposure process down. Exposing screens isn’t easy, but with a good light source like an LED bulb, you’ll be putting your best foot forward. Follow the steps and troubleshoot as you go. Don’t be afraid to make mistakes, and take notes along the way so you know what worked and what didn’t.